My Favourite Lightroom Tool!
Here’s my favourite editing tool in Lightroom that I absolutely can’t live without!
The TONE CURVE!
However, use it with grace. Less is definitely more with this baby! I just it very sparingly and I still get such dramatic results with it.
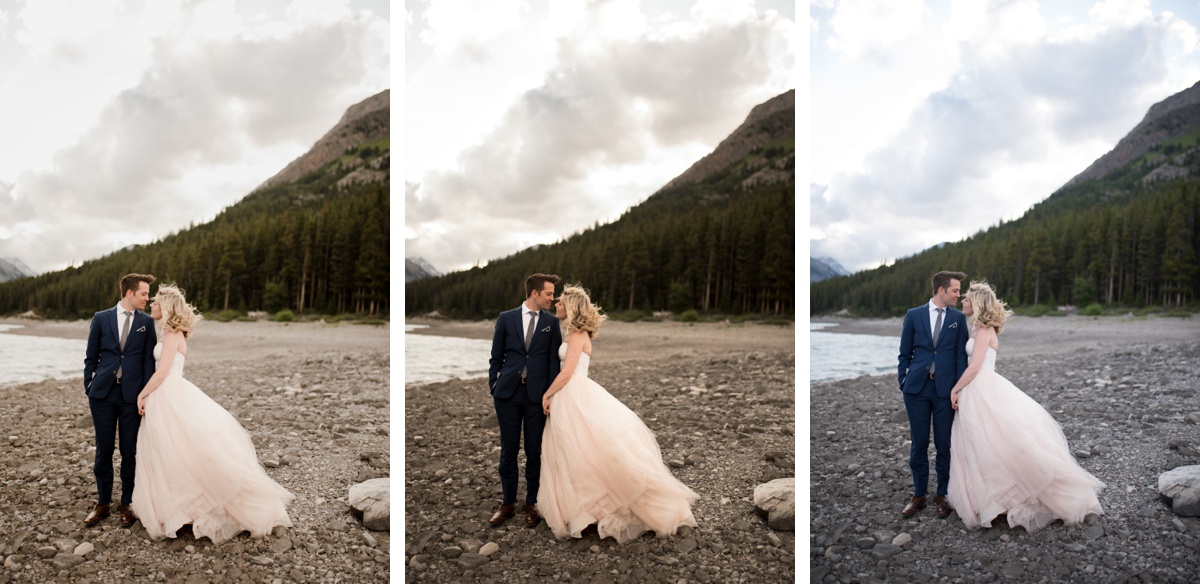
Here’s are two examples of my images. On the left, edited as usual, in the middle the tone curve is turned off and on the right is the RAW file. Don’t forget to utilize this incredible tool!


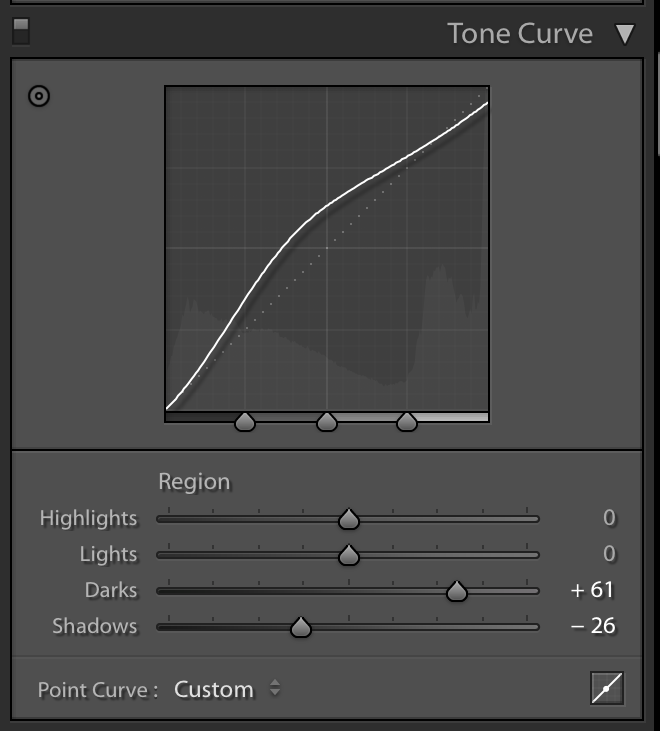
My favourite way to use the tone curve is to use it in slider form so it doesn’t get out of hand. This is what mine looks like, it helps to bring the light back into a photograph without sacrificing the contrast I love!

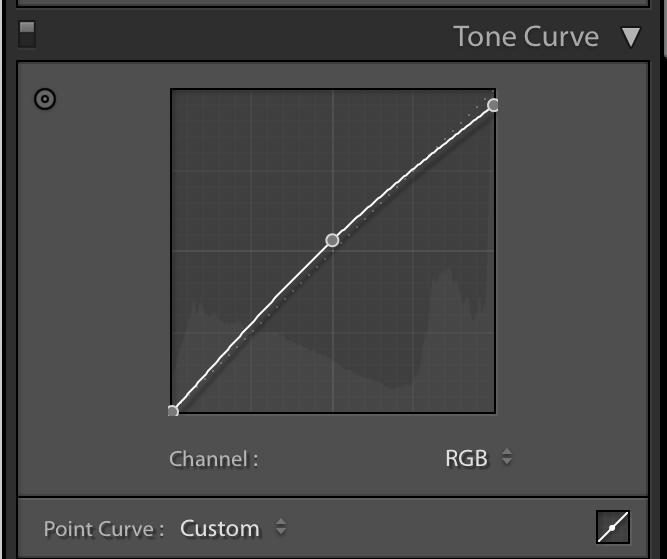
Second, I go to the Point Curve: Custom graph and pull up the mid-tones (mid-tones translate to skin tones in photographs) just slightly! This is what mine looks like, it’s so subtle but really puts the cherry on top with that wonderful glow!

If you want to add some life into your photos, this is my favourite way that looks natural and flattering!
(P.S. If your Lightroom doesn’t look like this, it’s because you’re using the Cloud Version. I highly recommend the Classic Version, so download that one and get familiar with it! It’s a more powerful tool, it just doesn’t have the cloud sharing features.)
To see more editing tips, head to the Learn tab in my blog or click HERE! If there’s something else you’re really struggling with, reach out on Instagram, I’d love to chat and help you through it!


